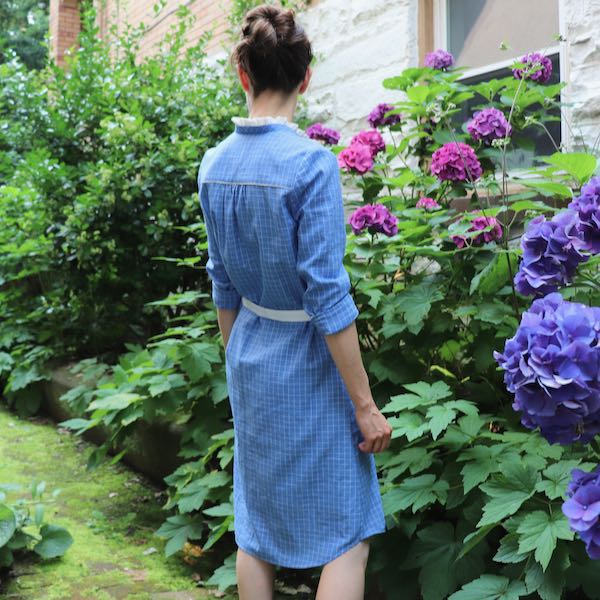
Planning our ShirtFest was so fun that I couldn’t resist getting in on the action. Pretty much everyone wears shirts, but if there is an exception to every rule, in this case it’s me! I’m more of a blouses and dresses kind of person. Although shirts and dresses come together as shirt-dresses, I don’t usually go for them. This was the right time to push my boundaries and make one. It helped that I’d come across a very pretty pattern, the Azur shirt or dress by the French pattern company Atelier Scämmit. The design combines a tailored look with some irresistible details, such as an optional tiny ruffle at the neckline.

The Azur pattern was also ideal to pair with our Wedgwood Checks handloom cotton, which I’ve been wanting to sew with since the day it arrived. Perfect color, perfect weight and drape… what’s not to like? However, since we’re exploring creativity in shirtmaking for ShirtFest, I wanted to do a little extra something for this dress. The white woven thread check in the fabric seemed to ask for some additional touches of white. When I found a remnant of white silk for the collar ruffle, I decided to make a matching narrow flat piping to define the shoulder yoke.

Though I didn’t make a muslin for this dress, which usually isn’t a good idea, I did at least compare the pattern pieces to a blouse that fits well to ensure that the upper body would work for me. Miraculously, the finished dress fits perfectly with no alterations. To make the shirt pattern into a dress, I added about 14 inches at the hem to make it knee-length. The pattern instructions were pretty good and the construction video on Atelier Scämmit’s website clarified any questions that arose. I made a few minor additions to the construction, including stay-stitching, which helps stabilize handwovens.

For the same reason, I added a very light fusible interfacing behind the buttons and buttonholes (above), as well as the sleeve plackets (below) to strengthen those areas which can be prone to stress on lightweight fabrics. Also, because I prefer a cleaner look without stitching, I did not stitch down the front button bands; the buttons and buttonholes hold the facings in place perfectly well.

The pattern, as written, called for French seams in most places with the obvious exception of the armscyes. I used bias bindings there, stitching the final pass by hand to keep the seam allowances supple.

Which sewing techniques do you go for again and again? For me it’s piping, either corded or flat. I often use it to add a hint of color or vintage style to a garment. Here’s how to add flat piping to the yoke: For this pattern, the yoke seam allowances are about 3/8 inch. Cut one-inch wide bias strips of the piping fabric and press them in half lengthwise, right sides out.

Draw a chalk line 1/2 inch from the edge of the yoke (right side up), then place the folded edge of the bias strip along the chalk line and baste it in place. When the dress front is placed on top of the yoke, right sides together and ready to sew, the bias fold is sandwiched between the layers. Sew the seam at 3/8 inch, open it up, and admire the 1/8 inch piping in the seam.

I had intended to do the same on the cuffs, but I completely forgot about it as I sewed merrily along and attached the cuffs. To curse and tear out, or to shrug and carry on? Always a sewing dilemma! But I knew that if I didn't fix it, I’d always regret it, so I took off the cuffs. Because the fabric was a little fiddly to unpick I didn’t want to dismantle the cuffs entirely; I kept the short ends intact but was still able to slip the piping in around the upper edge. It doesn’t reach all the way to the corners but turned out okay. (Does it even matter? I’ll probably wear the sleeves rolled up anyway!)

One last change which I made was to cut the outer collar band on the bias. This is the kind of subtle detail which I enjoy adding to my projects, just for fun. I interfaced this outer collar piece to make up for the slight loss of stability due to the bias grain line. (At bottom in the photo below; above that is the ruffle piece, and at top, the inner collar.)

I had to piece two strips of fabric together to do this and they didn’t match up perfectly; I love these slight irregularities of handloom fabrics. Maybe after lunch, feeling a little sleepy, the weaver didn't beat in the wefts quite the same way as before! (Have you seen the videos of how our fabrics are made?)

Similarly, the fabric’s checks don’t quite match down the entire center fronts of the dress, but I made sure to align them at the bust-level button, where it would be most noticeable. Speaking of buttons, when I came across a card of vintage Czech glass buttons in the perfect shade of blue squirreled away in my sewing room, I knew it was all meant to be!

This dress was my first major project since before the pandemic. Somehow I lost my will to sew during that very strange year. But I enjoyed every moment of this project, from the familiar soothing rituals of oiling the machine and winding bobbins, through the pleasurable puzzles of designing the dress and optimizing fabric layout, and of course the actual time spent at the sewing machine. I suspect that many of you were not sewing much last year, either. But I hope that you, like me, are rediscovering the joys of creativity and the desire to make something new. It feels great to be sewing again — and I love the new dress!


