
Part I: Making the Pattern for a Retro Tie Blouse
When our new handwoven linen/cotton blend fabric arrived, I immediately thought of a number of things I want to make with it, but there was no doubt which project would come first: I needed a new incarnation of my favorite blouse. There’s no particular pattern for this, but I’ll show you how to adapt your own pattern to create something akin to my Retro Tie Blouse.

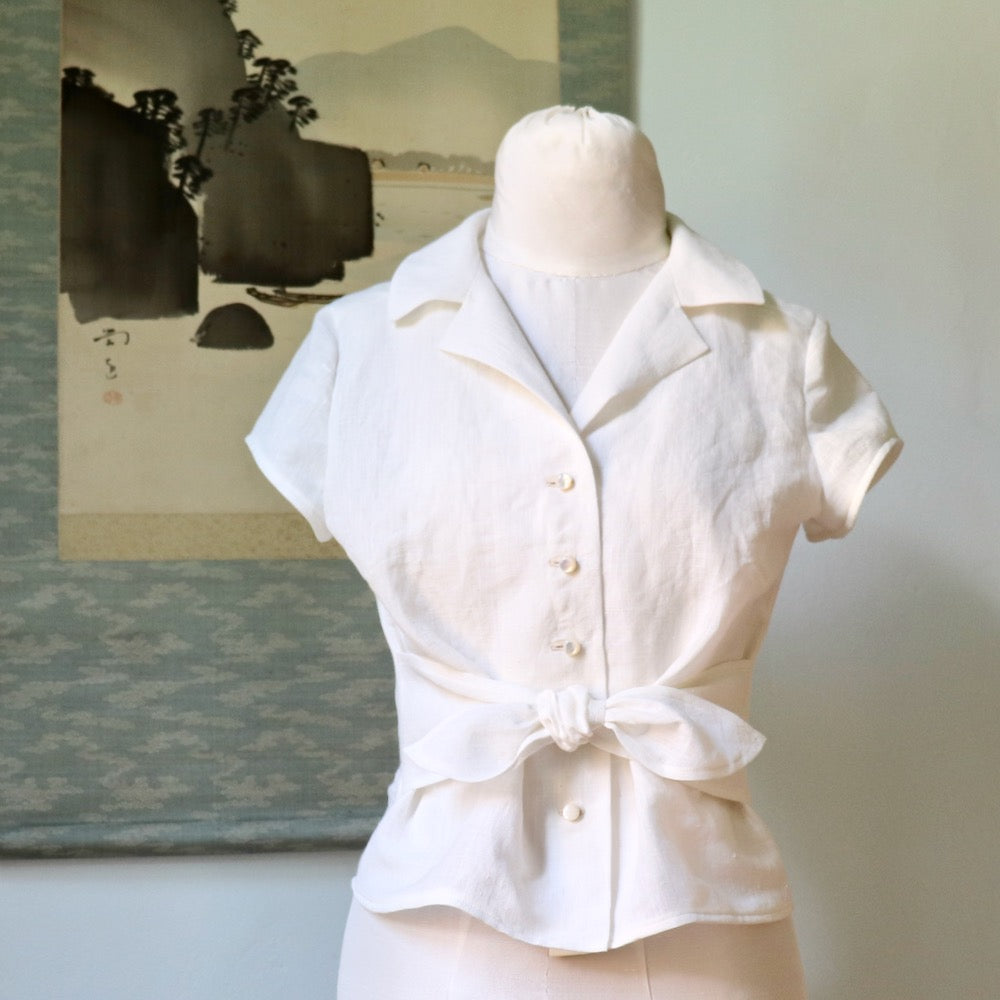
What sets this blouse apart is a charming vintage-style detail, namely, the jaunty tie front which gives a slightly high-waisted effect and creates soft folds between bust and waist. I bought the original Retro Tie Blouse many years ago and wore it so often that the fabric eventually split. This left such a hole in my wardrobe that I made a pattern from the remains of the blouse in order to copy it. But in the end I found that the most important element of the blouse was just the tie, a detail that could easily be added to other blouse patterns, too.

The blouse itself is quite simple, with little shaping, so it’s easy use another pattern to capture the look. The back of the original was only slightly fitted by narrow darts. The front has only small bust darts at the side seam and is otherwise unfitted through the waist, as you can see above. You could take any pattern for a plain blouse or even a camp shirt that fits you well and remove the front waist darts if necessary. How long do you want your blouse to be? Mine hits at the high hip, which also adds to the vintage look, but it could be any length.

Next, make a pattern piece for the ties measuring about 4 inches wide. How long should the tie be? Mine is about the same length as my front waist measurement. This might not be the same as half your waist measurement; the front waist is often larger than the back waist.) Alternatively, measure the width from the center front of your blouse to the side seam and then add 5 or 6 inches. For me, this is long enough to tie the ties in a double knot, leaving short, perky ends. Experiment with a scrap of muslin to find the right length for you.
To add to the cuteness factor, the last 4 or 5 inches of the loose ends of the ties taper to a curved point; use your French curve to draw a curve that is pleasing to your eye. How are you going to hem the ties? Once you’ve decided that, add a suitable hem allowance to the pattern piece you just made. For my blouse, I use 1/2 inch seam allowances all around the tie and added them in when I drafted it.

Fold your tie pattern piece in half lengthwise, aligning the long straight edges, and cut out along the curved end to ensure that the two sides match. As you can see, there's nothing difficult here - it's just a tie!
That’s it for the pattern making! Next time we’ll stitch the blouse.

Addendum:
For those who like the technical details, here are a few more notes on my own blouse pattern. I originally copied this blouse from an existing garment which had never fit well. Then I combined it with a 1960s blouse pattern found in my stash (Vogue 6037) which had a cuter collar as well as a shoulder yoke, which improved the fit significantly. Finally, due to swayback issues which made the blouse puddle in my lower back, I chopped the bodice back pattern piece in half at the waist and morphed the lower back portion into a peplum. The back-waist seam this created basically serves the same function as that fisheye dart that gets pinned out to create a swayback adjustment. Much better now!
Read Part II: Making the Blouse.
Follow