Part II: Making the Blouse

Last time we learned how to adapt a blouse pattern to create a Retro Tie Blouse look. This blouse is best made of soft woven fabrics, such as linen, voile, or many of our handwoven cotton fabrics. Sometimes it can be hard to find light weight natural fiber fabrics suitable for making garments, rather than crafts - that’s part of why I started Loom & Stars! The handloom linen/cotton blend fabric I chose for this blouse is airy and semi-sheer. It combines the nubby texture of linen with softer handspun cotton, capturing the best of both of these amazing fibers. Can you tell I love it?
Having selected your fabric, first prepare it according to how you will treat the finished garment. Then cut our your blouse, including two tie pieces cut along the lengthwise grain of the fabric.
Before being attached to the blouse, the ties will need to be hemmed according to whatever method you chose when you drafted the tie piece in Part One of our Retro Tie Blouse pattern hack. For my blouse, I used 1/2 inch hem allowances, first pressing them up 1/2 inch with my super low-tech sewing gauge, then folding the raw edge into the fold. It’s always a little approximate around the curves, but that's fine as long as the edge is smooth.

The resulting hem is a little over 1/4 inch wide, so I can stitch it with my 1/4 inch foot. Take care at the point of the tie, and mark the spot where you’ll have to pivot the needle if that helps you to stitch it neatly. (My chalk mark didn’t show up in the photo so I marked the photo itself, as you see above.)

When you've pivoted at the point of the tie, you may need to wedge something under the back of the pressure foot to keep it level so your machine will continue to stitch smoothly. Don’t hem the short, un-pointed end of the tie; that will go into the side seam.

All done! The ties will smooth out when pressed.
Next, assemble your blouse as usual up to the point where you sew the side seams. When you’re ready to do that, try on the blouse and decide where you want to place the ties. I like to have the bottom edge of the tie approximately at my natural waistline, which creates a slightly high-waisted effect.

Sandwich one tie piece in each side seam (the ties should be placed with the same side facing upwards as the blouse front pieces) and stitch. I used French seams on my blouse, so I first stitched the side seams wrong sides together without the ties, and pressed and trimmed the seam. Then I basted the tie ends into place and stitched the second pass of the French seam, which enclosed the tie ends in the seam.
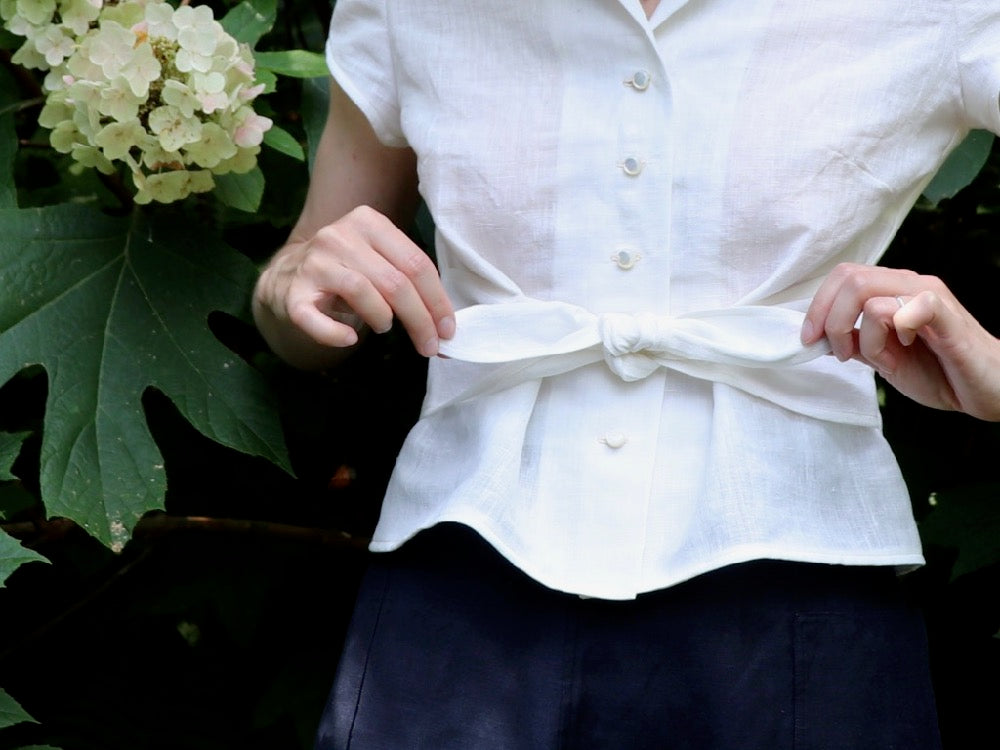
Finish your blouse as usual. Then run to the mirror, try on your new blouse, tie the ties, and see the magic of this design! The cinching action of the ties causes the unfitted blouse front to form loose pleats that release at the bust. I find the soft fullness really flattering - and pretty adorable too!

Recently I saw a pattern with a similar effect in Named Clothing’s book Breaking the Pattern. Their Solina Dress and Top pattern has short ties stitched into soft pleats under the bust for a sleeker, more tailored version of this look. That would also look great made with one of our handwoven cotton fabrics!
Read Part I: Making the Pattern.
Follow